How to Add McAfee SECURE Seal to Your WordPress Site for Free
- November 22, 2016
- Posted by: Sadman Sakib
- Category: Security Tips

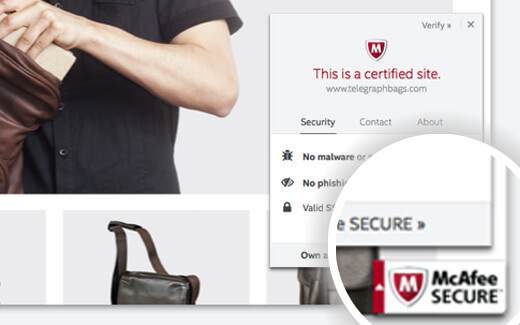
If you’ve shopped on the internet, then you’re probably familiar with website security seals such as Norton and McAfee. These badges show users that you have taken all the necessary precautions to make your website safe and secure. This social proof helps increase user’s trust level to subscribe to your website and make a purchase. In this article, we will show you how to easily add McAfee SECURE seal on your WordPress site for free.
What is McAfee SECURE?
McAfee SECURE is a new certification program by McAfee that lets your visitors know that your website is safe.
This is a great solution for small business owners. The free plan will show the trustmark to 500 visitors per month. For $9 per month you can upgrade to the pro plan which allows you to show trust mark to unlimited users.
The video below explains what this security seal does in 50 seconds:
How to Install McAfee SECURE in WordPress
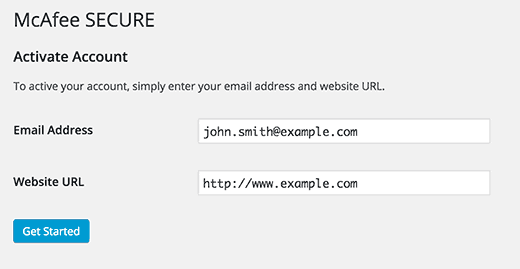
First thing you need to do is install and activate the McAfee SECURE plugin on your website. Upon activation, you need to visit Settings » McAfee SECURE to configure the plugin.

Simply provide your email address and your website’s domain name and then click on the get started button.
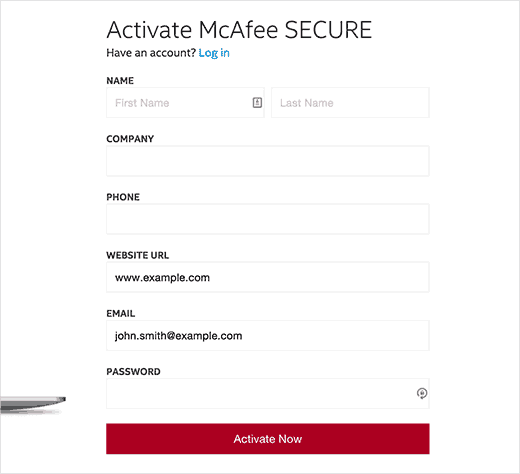
This will take you to McAfee Secure website, where you need to provide your personal and business information like name, company name, phone number, etc.

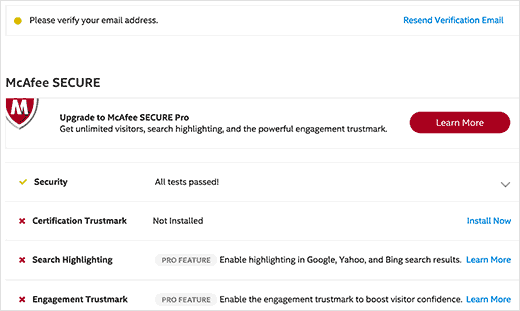
McAfee will now run some tests on your site, and you will land on a confirmation page. This page will show all tests passed under the security heading. You will also be reminded to confirm your email address. Simply check your inbox for an email from McAfee and then click on the confirmation link inside it.

To further strengthen your security, you can add an SSL and HTTPS in WordPress. We hope this article helped you add McAfee Secure badge to your WordPress site.
