How to Add One-Click Gmail Login to WordPress Website
- November 13, 2016
- Posted by: Sadman Sakib
- Category: WordPress Tutorial

Having to enter login details for multiple platforms is an inconvenience that most of us have simply come to accept. However, by incorporating one-click Gmail login on your WordPress website, you can easily skip that step every time you login to your website – saving yourself a bit of time and bother.
This article will firstly walk you through why you would want to setup one-click Gmail login on your website, then provide step-by-step instructions to that very end.
What Is One-Click Gmail Login?
Although we say one-click Gmail login, we’re actually talking about logging in through Google itself, as Google comprises both Gmail as well as G Suite. G Suite (formerly known as Google Apps) is one of Google’s premium services, consisting of a set of applications including Gmail, Docs, Drive, and Calendar (read more about the benefits of the service here).
Whether you use the free version of Gmail or the premium G Suite offering, setting up one-click login with Google will net you quick and easy access to your WordPress account. If your browser already has you logged into Google, you won’t have to enter the customary credentials in order to login to WordPress. Instead, your login page will look like this:
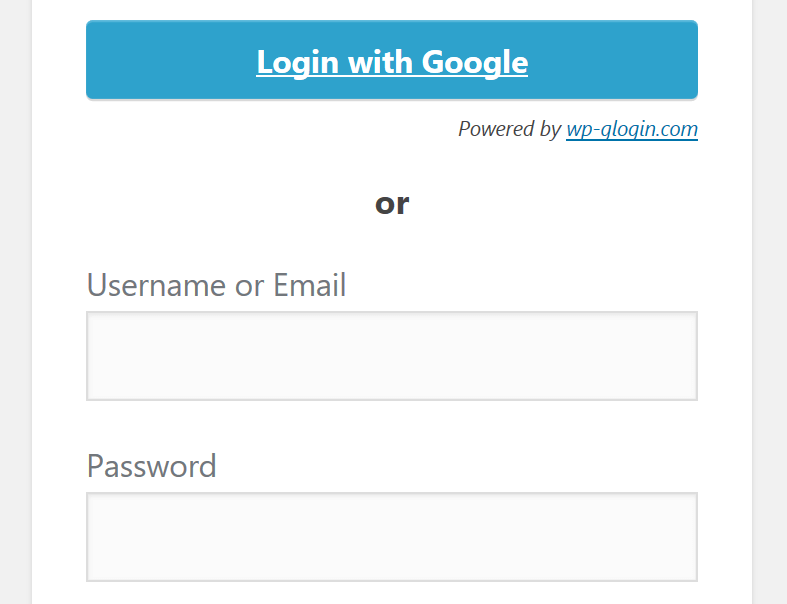
You’ll simply click on the Login with Google button and be granted entry to the admin panel.
What Are the Benefits, and Is One-Click Login Safe?
As we discussed above, enabling one-click login with Gmail would save you the hassle and time taken repeatedly logging in with your WordPress account credentials.
A scenario where one-click Gmail login is particularly helpful would be a company that has multiple G Suite and WordPress users. Many companies turn to G Suite for professional [email protected] email addresses for employees. Consequently, if a company also uses WordPress for its website, any WordPress user linked with a G Suite account would be able to quickly and easily access the website’s back end with a single click.
The concern that crops up, however, is security. You’re probably wondering whether a convenient single-click login process can also be a secure one. That’s where OAuthcomes in.
OAuth is an open protocol created to simplify web authorization processes. It enables authorized third-party access to specific applications (like Gmail and G Suite) without compromising security. If you’re interested in learning more about the technical details behind OAuth, Google has excellent resources.
How to Add One-Click Gmail Login to Your Website
To add one-click Gmail login to your website, we’ll use the Google Apps Login plugin.
Google Apps Login

The basic version of the plugin is completely free. As such, it’s an ideal solution for small businesses that don’t need functionality beyond single-click login.
To unlock some of the more advanced features of the Google Apps Login plugin, you can choose to go with the the Premium version. This version completely eliminates the need for WordPress user management, as information from G Suite user accounts are automatically pulled into the site’s back end. New users can be automatically created for G Suite users with a specific domain. Pricing starts at $29 for 1–10 users.
For even more versatility, check out the Enterprise version starting at $199 for 1–10 users. This variety of the plugin simplifies user management even further: you can set new website users to have different levels of access to the back end dependent on their Google Groups memberships. Additionally, you also get detailed reporting of the account changes made by the plugin.
Setting up Google Apps Login
Once you’ve installed and activated the plugin, head over to the Settings screen. In the Main Setup tab, you’ll be prompted to enter your Client ID and Client Secret. To obtain these, visit the Google Cloud Console page:

Click the Project tab, then the Create project link as shown above. Enter your website or company name when prompted, agree to the terms, and hit the Create button. Once that’s completed, look to your side menu and navigate to the Credentials tab. Select OAuth consent screen:

Enter the appropriate email address and product name, customize the homepage URL and product logo (optional), and hit the Save button:
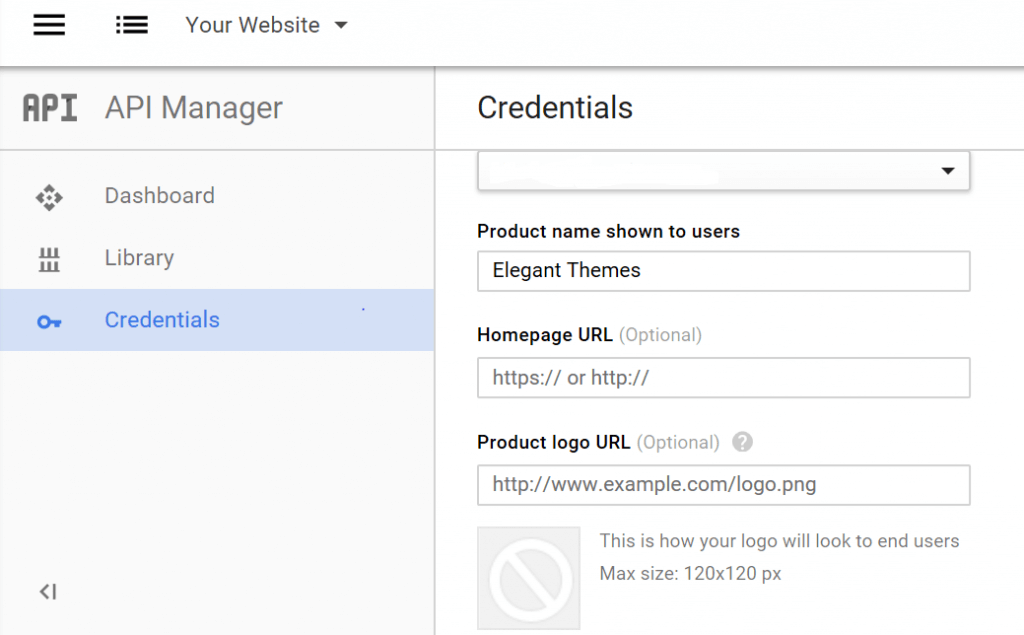
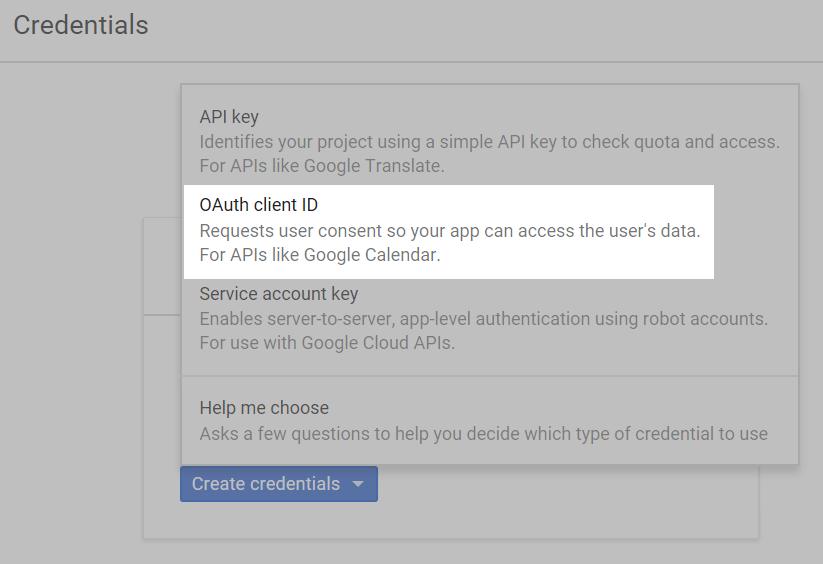
Now select the Credentials tab again, click the Create Credentials button, and choose OAuth client ID:
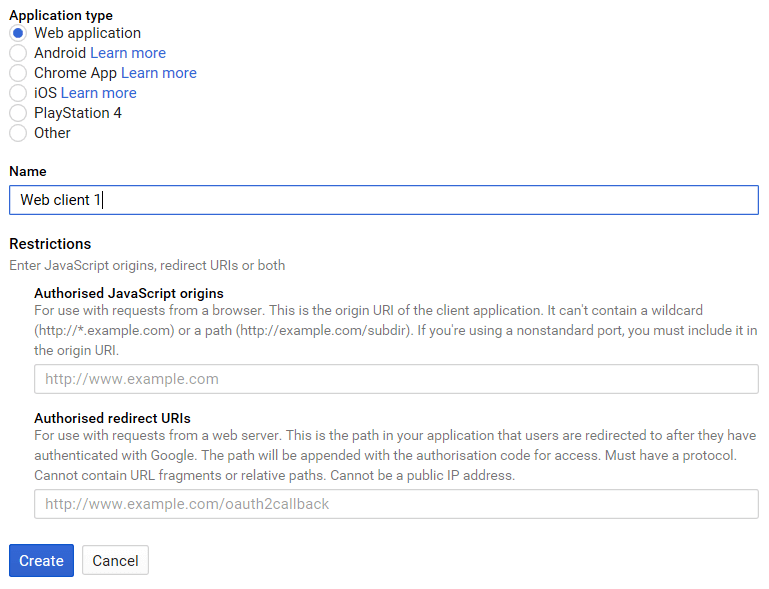
On the resultant screen, select Web application under Application type. For Authorized JavaScript origins enter your website address. Under Authorized Redirect URIs enter your login page address (e.g. http://www.example.com/wp-admin):
Click Save to see your Client ID and Client Secret:
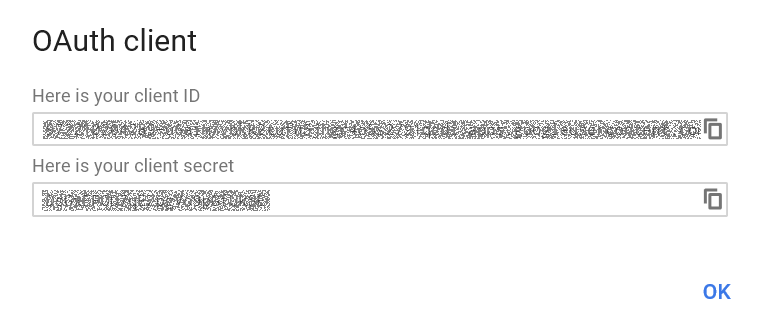
Now copy these items, head back to the Settings screen for the Google Apps Login plugin, and paste them in the appropriate text areas. Hit the Save Changes button, and you’re officially good to go.
To further customize features of your new login, go to the Advanced Options tab. You’ll find Premium or Enterprise options under the Domain Control tab.
Conclusion
Login credentials are naturally imperative for site security, but it’s not necessary to key them in every time you login to your site. With one-click Gmail login for WordPress, you’ll save yourself and your other site users significant time and hassle.
Using the process outlined in this article, you can have one-click Gmail login setup on your site in no time at all. Just link your Gmail or G Suite account to your site using the Google Apps Login plugin and Google Cloud Console, then customize the settings to suit your needs.
