How to Change Custom Post Type Permalinks in WordPress
- November 30, 2016
- Posted by: Sadman Sakib
- Category: WordPress Tutorial

Recently, one of our readers asked if it was possible to change the custom post type permalink structure in WordPress. By default, you can change the permalink structure of WordPress posts, but not custom post types. In this article, we will show you how to change custom post type permalinks in WordPress.
Why Change Custom Post Type Permalinks in WordPress?
WordPress uses SEO friendly URL structure which makes your WordPress URLs readable and search engine friendly. These SEO friendly URLs are called permalinks.
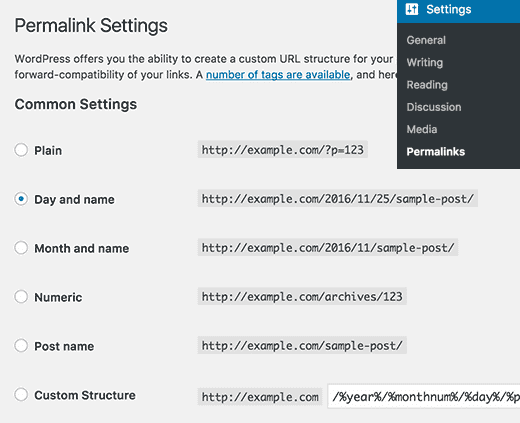
You can customize permalinks by visiting Settings » Permalinks page. However, you will notice that you can only change permalink structure for blog posts.

If you are using custom post types or custom taxonomies on your website, then WordPress will use default permalink structure for those.
For example, if you have a custom post type called ‘Movies’, then its URL structure will look like this:
http://example.com/movies/the-force-awakens/
If your custom post type has archives enabled, then the archive page URL will look like this:
http://example.com/movies/
This URL scheme is quite SEO friendly and in most cases you don’t need to change it. However, sometimes you may want to customize it to meet your own needs.
Having said that, let’s see how you can easily customize custom post type permalink structure in WordPress.
Changing Custom Post Type Permalinks in WordPress
First thing you need to do is install and activate the Custom Post Type Permalinks plugin.
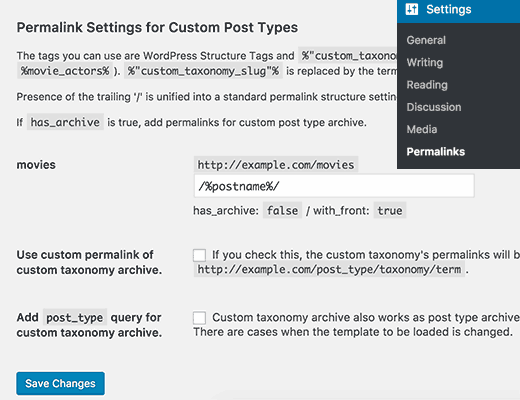
Upon activation, you need to visit Settings » Permalinks page and scroll down to ‘Permalink Settings for Custom Post Types’ section.

Here you can change the permalink structure of single items in your custom post type. You can use all the standard WordPress permalink tags.
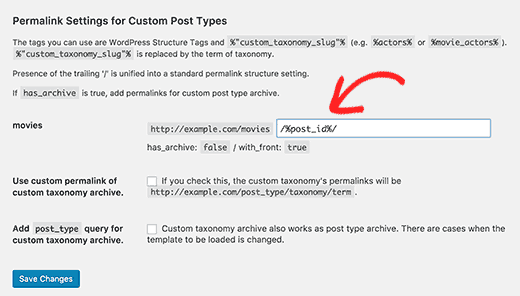
Let’s assume that you want to use post ID instead of post name in the URL. In that case all you need to do is add this tag:
/%post_id%/
Notice the trailing slashes at the beginning and end of the tag. These trailing slashes are the separators, and without them your permalinks will not work.

Don’t forget to click on the save changes button to store your settings.
Now the permalinks for a single item in your custom post type will look like this:
http://example.com/movies/133/
The number in the URL will be the numeric ID of the post in your WordPress database.
Let’s take a look at another example.
Let’s say you want to add /year/ before the post name in URL. In that case, you will use these tags:
/%year%/%post_name%/
Click on the save changes button to update your permalinks.
Now the single item permalink for your custom post type will look like this:
http://example.com/movies/2016/the-force-awakens/
So far so good. Now let’s try another example.
Let’s assume that you are using a custom taxonomy called ‘genre’ with your custom post type ‘movies’ and you want to add the custom taxonomy term into the URL. In that case, you will use these tags:
/%genre%/%post_name%/
In this example, genre is the slug of our custom taxonomy.
Click on the save changes button to update your permalinks.
Now the single item permalink for your custom post type will look like this:
http://example.com/movies/sci-fi/the-force-awakens/
That’s all, we hope this article helped you learn how to easily change custom post type permalinks in WordPress.
