How to Build a Pricing Table in WordPress
- November 29, 2016
- Posted by: Sadman Sakib
- Category: WordPress Tutorial

When it comes to turning website visitors into buyers, one of the best things you can do is help them choose the right option for their needs and their budget.
And one of the most effective ways to do that is by presenting all the important information in a pricing comparison table. Not sure how to build a pricing table in WordPress? Don’t worry, we’ll help guide you through the process.
Why Are Pricing Tables So Effective?
Pricing tables are an essential tool when it comes to communicating the value and the benefits that you have to offer. They help your website visitors compare different packages quickly so that they can easily see which one is the best for them. When done right, pricing tables enable your visitors to clearly see the value in your offering and turn into a paying customer.
Today’s post will show you how you can easily add pricing tables to your website by building them from scratch and we will also show you a few useful tools and plugins in case you want a solution that doesn’t involve code.
How to Build A Pricing Table In WordPress From Scratch
Building a pricing table from scratch is done with HTML code which will give us the structure for our table and then styling it with CSS.
To get started, log into your WordPress website, navigate to the dashboard and click on Pages → Add New. You can also add the code to an already existing page where you would like your pricing tables to show up.
Once the WordPress editor loads, switch to the text mode and paste the following code:
<div class="pricing-table">
<div class="one-third first">
<ul>
<li class="header">Basic</li>
<li class="grey-blue">$ 9.99 / year</li>
<li>List Item #1</li>
<li>List Item #2</li>
<li>List Item #3</li>
<li>List Item #4</li>
<li>List Item #5</li>
</ul>
<a class="pricing-button" href="#">Sign Me Up!</a>
</div>
<div class="middle one-third">
<ul>
<li class="header-blue">Pro</li>
<li class="light-blue">$ 99.99 / year</li>
<li>List Item #1</li>
<li>List Item #2</li>
<li>List Item #3</li>
<li>List Item #4</li>
<li>List Item #5</li>
</ul>
<a class="pricing-button" href="#">Sign Me Up!</a>
</div>
<div class="one-third">
<ul>
<li class="header">Business</li>
<li class="grey-blue">$ 199.99 / year</li>
<li>List Item #1</li>
<li>List Item #2</li>
<li>List Item #3</li>
<li>List Item #4</li>
<li>List Item #5</li>
</ul>
<a class="pricing-button" href="#">Sign Me Up!</a>
</div>
</div>
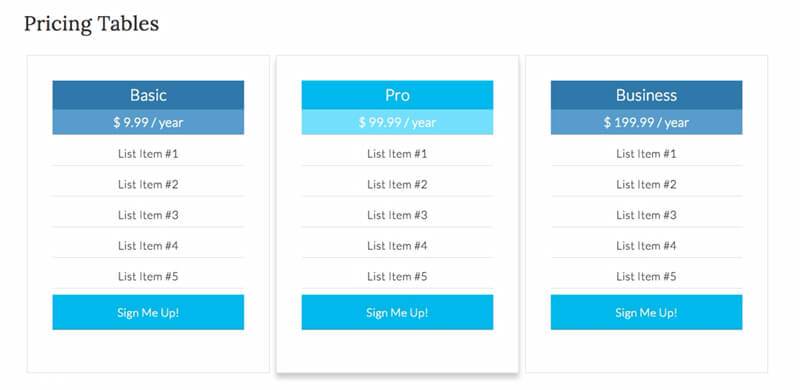
The code is rather simple: first, we create a div to hold our pricing table code and make it easy to style them with CSS. Then, since we are creating three tables, each of them is wrapped in a one-third column. The last part is the table itself, with added classes for a header and price point which will make them stand out from the rest of the table.
Before clicking on Publish or Update, be sure to replace the text between the [pre]<li> and </li>[/pre] tags with your own and to add the link to your payment form after the href part of the link.
Once you replaced all the information, go ahead and click on Publish if you created a new page or Update if you added the table to an existing page.
If you look at your page now, you’ll notice the pricing table looks very plain. Let’s add some styling to it.
If you’re using a child theme as you should add the following code to your child theme’s stylesheet, or to the Custom CSS editor.
The first part of the code will make sure our pricing table displays in columns and if you want to or need to display more than three tables, these classes will allow you to easily replace them:
/* ## Column Classes
--------------------------------------------- */
.five-sixths,
.four-sixths,
.one-fourth,
.one-half,
.one-sixth,
.one-third,
.three-fourths,
.three-sixths,
.two-fourths,
.two-sixths,
.two-thirds {
float: left;
margin-left: 2.564102564102564%;
}
.one-half,
.three-sixths,
.two-fourths {
width: 48.717948717948715%;
}

.one-third,
.two-sixths {
width: 31.623931623931625%;
}
.four-sixths,
.two-thirds {
width: 65.81196581196582%;
}

.one-fourth {
width: 23.076923076923077%;
}
.three-fourths {
width: 74.35897435897436%;
}
.one-sixth {
width: 14.52991452991453%;
}
.five-sixths {
width: 82.90598290598291%;

}
.first {
clear: both;
margin-left: 0;
}
The second part of the code will give the actual styling to the tables.
/* ## Pricing Table
--------------------------------------------- */

.pricing-table {
line-height: 1;
}
li.header {
background-color: #2f79a9;
color: #fff !important;
font-size: 25px;
border-bottom: 1px solid #2f79a9 !important;
margin-bottom: 0 !important;
}
li.grey-blue {
background-color: #569dcc;
color: #fff !important;
font-size: 20px;
}

li.header-blue {
background-color: #00b9eb;
color: #fff !important;
border-bottom: 1px solid #00b9eb !important;
font-size: 25px;
margin-bottom: 0 !important;
}
li.light-blue {
background-color: #72dffd;
color: #fff !important;
font-size: 20px;
}

.middle {
box-shadow: 0 8px 12px 0 rgba(0,0,0,0.2)
}
.pricing-table .one-third {
background-color: #fff;
margin: 20px 5px;
padding: 40px;
width: 32.33%;
}

.pricing-table .one-third:nth-child(3n+1),
.pricing-table .one-third:nth-child(3n+2),
.pricing-table .one-third:nth-child(3n) {
border: 1px solid #ddd;
}

.pricing-table .one-third ul {
margin: 0;
}

.pricing-table ul li {
border-bottom: 1px solid #ddd;
color: #333;
margin-bottom: 10px;
padding: 10px;
text-align: center;
list-style-type: none;
}

.pricing-table a.pricing-button {
background-color: #00b9eb;
border: 3px solid #00b9eb;
color: #fff;
display: block;
text-align: center;
padding: 16px 24px;
}

.pricing-table a.pricing-button:hover {
background-color: #000;
border: 3px solid #000;
color: #fff;
}

/* Pricing Table - Media Queries for Mobile Devices
--------------------------------------------- */

@media only screen and (max-width: 1140px) {
.pricing-table .one-third {
width: 32%;
}
}

@media only screen and (max-width: 800px) {
.pricing-table .one-third {
width: 100%;
}
}

@media only screen and (max-width: 568px) {
.pricing-table .one-third {
width: 100%;
}
}

@media only screen and (max-width: 480px) {
.pricing-table .one-third {
width: 100%;
}
}

@media only screen and (max-width: 420px) {
.pricing-table .one-third {
width: 100%;
margin: 20px 0;
}
}
We added some simple, basic styling for the pricing tables and styled the header and price differently to make them stand out. We also added a box shadow around the middle table to highlight that specific package. Finally, we added some media queries to make sure the tables are responsive.

Once you’ve pasted both CSS snippets, go ahead and click on Update File. Now take a look at your page and make sure everything displays the way you want it.
How to Add a Pricing Table in WordPress With a Plugin
Adding a pricing table manually like we’ve done above is a quick an easy solution if all you need is a simple pricing table. If on the other hand, you want more features and more control over the look and feel of your pricing tables, then using one of many popular WordPress plugin is definitely the way to go.
Below are our suggestion for the best pricing tables plugins for WordPress.
Responsive Pricing Table

Responsive Pricing Table comes with an intuitive panel that makes it easy to create a pricing table. You can quickly add features to your different plans, choose a color and display your price table anywhere with a simple shortcode.
Features include:
- Simple table creation process with all the preset fields (title, description, prices, time period, icons, and payment buttons).
- Enables you to highlight specific plans and increase your conversion rates
- Insert your tables into any kind of post using shortcodes.
Responsive Pricing Table is a free plugin available from the official plugin repository.
Easy Pricing Tables

Easy Pricing Tables has both a free and premium version. The free version actually works quite well and is a great solution to setup a pricing table in WordPress. It features responsive tables, a drag & drop reorder, custom CSS, and will work with any WordPress theme. You just create your table, drop the short code into your page or post, and your good to go. The premium version also comes with the following features:
- Ten Gorgeous Pricing Table Designs.
- Fully Customize your Pricing Table (Colors, etc…).
- Priority Email Support.
- Tooltips.
- Google Analytics Integration (track pricing table button clicks).
- Pricing Toggles (switch between multiple pricing tables – eg. currencies or monthly/yearly pricing.
Go Pricing

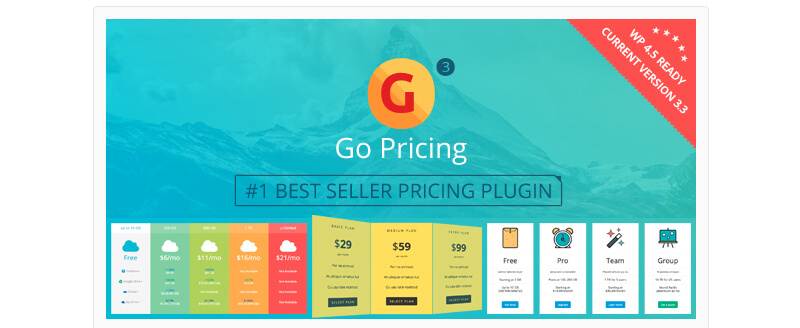
Go Pricing is a premium plugin that packs quite a punch. This plugin has every functionality you could ever imagine in a pricing table plugin and then some. It takes pricing tables to a whole new level.
Some of the features in Go Pricing plugin include:
- Over 250 default templates for your tables
- Enables you to choose all the Google Fonts and over 1900 icon fonts for your designs
- Comes with a live preview mode
- Integrated support for Paypal purchase buttons
- Fully compatible with Visual Composer, which makes customization a breeze
- All designs are optimized for touch devices
Go Pricing is available for $25 from CodeCanyon.
Plugmatter Pricing Table Pro

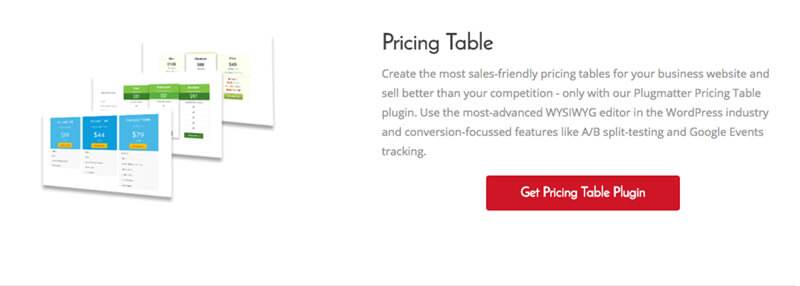
The Plugmatter Pro Pricing Table Plugin is a premium plugin for WordPress that promises to take your sales to a whole new level while complementing your website’s design.
What makes this plugin stand out from the competition is the plugin’s conversion optimization feature which is backed by behavioral research and conversion rate optimization (CRO) studies.
With Pricing Table Pro plugin, you get 10 fully responsive, customizable pricing table templates which are easily editable through an intuitive WYSIWYG editor without touching a single line of code. Best of all, you can perform A/B split tests on your pricing tables to see which design converts better.
Features include:
- Intuitive WYSIWYG Editor
- Drag and drop sorting columns/rows
- Google Web Fonts and Font Awesome
- Google Events Tracking
- A/B Split Testing
- 23 editable buttons
- Cell editor loaded with options
Plugmatter Pricing Table Pro plugin has three plans to choose from with the lowest priced at $47.
Wrapping Up
Pricing tables are popular for a reason. Aside from adding value to your offerings, they can help you reach your business goals and improve your conversion rate.
At the very least, a basic pricing table will have three tiers to establish a service hierarchy. The first or basic tier usually serves as an entry level hook. This tier is usually low-priced or even free and has only the bare minimum of useful features. The other two tiers will usually increase the number of features and be higher priced.
