How to Properly Setup Google AMP on Your WordPress Site
- December 5, 2016
- Posted by: Sadman Sakib
- Category: Beginners Guide

Do you want to setup Google AMP on your WordPress site? Accelerated mobile pages or AMP is a way to make your website load faster on mobile devices. Fast loading websites offer better user experience and can improve your traffic. In this article, we will show you how to set up Google AMP in WordPress.
What is Google AMP?
Google AMP stands for Accelerated Mobile Pages. It is an open source initiative supported by technology companies like Google and Twitter. The goal of the project is to make web content load faster for mobile users.
For many mobile users, reading on the web is often slow. Most content rich pages take several seconds to load despite all efforts taken by site owners to speed up their website.

Accelerated Mobile Pages or AMP uses bare minimal HTML and limited Javascript. This allows the content to be hosted on Google AMP Cache. Google can then serve this cached version to users instantly when they click on your link in the search results.
It is very similar to Facebook Instant Articles. However, Instant Articles are limited only to Facebook’s platform, more specifically to their mobile app.
Accelerated Mobile Pages are platform-agnostic and can be used by any app, browser, or web viewer. Currently it is used by Google, Twitter, LinkedIn, Reddit, and others.
Pros and Cons of Google AMP (Accelerated Mobile Pages)
SEO experts claim that Accelerated Mobile Pages will help you rank higher in Google, and it improves the user experience for mobile users on slow internet connections. However, they are several challenges for website owners, bloggers, and marketers.
AMP uses limited set of HTML, JavaScript, and CSS. This means you cannot add certain widgets and features to your mobile AMP website. This limits your ability to add smart email optin forms, facebook like boxes, and other dynamic scripts.
While Google AMP supports Google Analytics, it does not support many other analytics platforms. Same goes for advertising options which are limited to select few advertising platforms.
Despite its limitations, Google is pushing AMP pages by giving them a boost in mobile search.
If significant chunk of your traffic comes from mobile searches, then you may benefit from adding AMP support to improve and maintain your SEO.
Note: There have been a few complaints about Google AMP by bloggers.
First is by Alex Kras who claim that you can potentially lose mobile traffic if you enable Google AMP. Read the article thoroughly because that’s a huge problem, and despite what the Google Tech Lead for AMP project has said, there aren’t any good solutions that address the issue in our opinion.
Second is by Terrence Eden which highlights the difficulties of switching back from Google AMP should you change your mind in the future. We don’t believe this is a major issue because you can do a 301 redirect which several have pointed out in the comment section of his blog posts, but nonetheless it is something you need to think about.
However since several of our readers asked about how to setup Google AMP in WordPress, we have created a step by step process on how to setup Accelerated Mobile Pages in WordPress.
Setting up Accelerated Mobile Pages or AMP in WordPress
First thing you need to do is install and activate the AMP plugin.
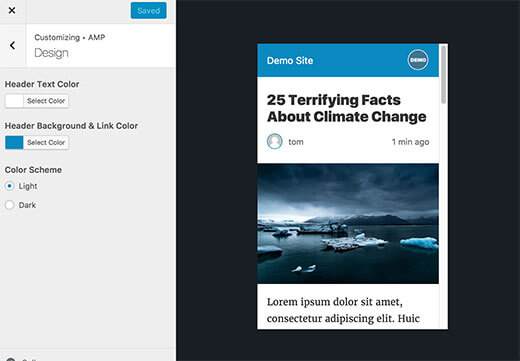
Upon activation, you can head over to Appearance » AMP page to see how your site looks on mobile devices using AMP.

You can change the header background and text color on this page. The header background color you choose will also be used for links.
The plugin will also use your site’s icon or logo if your theme supports it. Don’t forget to click on the save button to store your changes.
You can now visit any single post on your website and add /amp/ at the end of the URL. Like this:
http://example.com/2016/10/my-blog-post/amp/
This will show you a stripped down AMP version of the same post.

If you view the source code of the original post, you will find this line in the HTML:
<link rel="amphtml" href="http://example.com/2016/10/my-blog-post/amp/" />
This line tells search engines and other AMP consuming apps/services where to look for the AMP version of the page.
Troubleshooting:
If you see a 404 error when trying to view the amp version, then here is what you need to do.
Visit Settings » Permalinks page in your WordPress admin and click on the ‘Save Changes’ button. Remember, don’t change anything here, just press the save button. This will refresh your website’s permalink structure.
View Accelerated Mobile Pages in Google Search Console
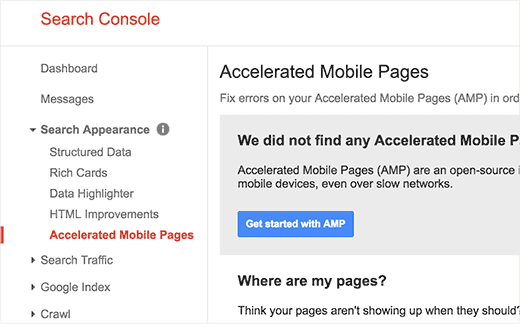
Want to know how your Accelerated Mobile Pages are doing in Google Search? You can easily check this using the Google Search Console.
Log in to your Google Search Console dashboard and then click on Search Appearance » Accelerated Mobile Pages.

Don’t worry if you don’t see your AMP results right away. It may take a while for Google to index your Accelerated Mobile Pages and then show data in Search Console.
Extending and Customizing Your Accelerated Mobile Pages
The AMP plugin for WordPress comes with very limited customization options. However you can use some other WordPress plugins to add few more customizations.
If you are already using Yoast SEO, then you need to install and activate the Glue for Yoast SEO & AMP.
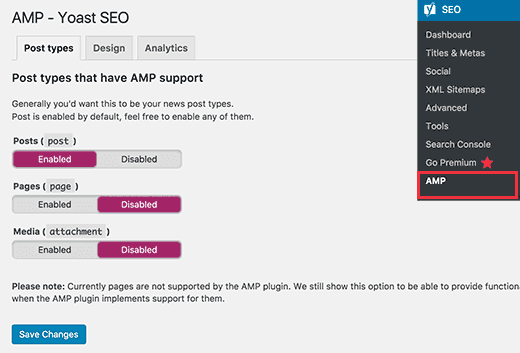
It is an add-on plugin for Yoast SEO and AMP plugins. Upon activation, you need to visit SEO » AMP page to configure plugin settings.

The plugin allows you to enable AMP support for other post types.
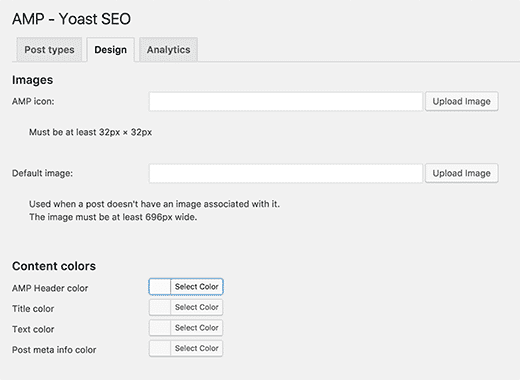
On the design tab, you can choose colors and design options. You can also upload a logo and a default header image which will be used when a post does not have its own featured image.

You can switch to the Analytics tab to add your Google Analytics ID.
Don’t forget to click on the save settings button to store your changes.
